Nuke Toolkit | Learning The Interface [Lesson 1]
Todays lecture had us visit the digital compositing tool, 'NukeX', version 11.2v3. The software is predominately node based, which allows you to adjust certain filters, animation and alterations efficiently, without it becoming a permanent facet of the composition (as seen in Adobe AfterEffects). Since it's technically part of the same family as Maya, it shares similar controls and shortcuts (alt + drag to move viewport image etc.)


This specifically relates to the 'viewport' only, and doesn't effect the actual composition. The buttons include 'RGBA' (the shortcut corresponds to the respective letters, R-red, G-green etc. Pressing these twice will return to the original image); 'Title Safe' (if unsure on particular format played back on, you can use this button to avoid the cut off of text); 'Clip Warning: Exposure' (shows values exceeding 1, i.e. bright hotspots). Additionally, the F shortcut reorients the frame, while H both reorients and fills the frame.
Below the viewport is the timeline.
The 'Orange Line' relates to the processed data. It may take multiple playbacks before it runs back smoothly. If not it could be a matter of 'Frame Rate' (bottom left: 24), which you can change using the drop down menu.
'Blue Lines' represent keyed frames. If easier, you can rerun back one frame at a time, skip to the last keyed frame, or type in how many frames on you wish to skip (you can see it beneath frame 35, with the number 10 with arrows either side).
IO is a tool that restricts playback between these two points only.
You can also change what happens once the film is finished; 'Bounce' sees it reverse back; 'End' sees it simply stop once played; 'Repeat' is self explanatory; and 'Continue' sees the key frame count continue beyond the footage itself.

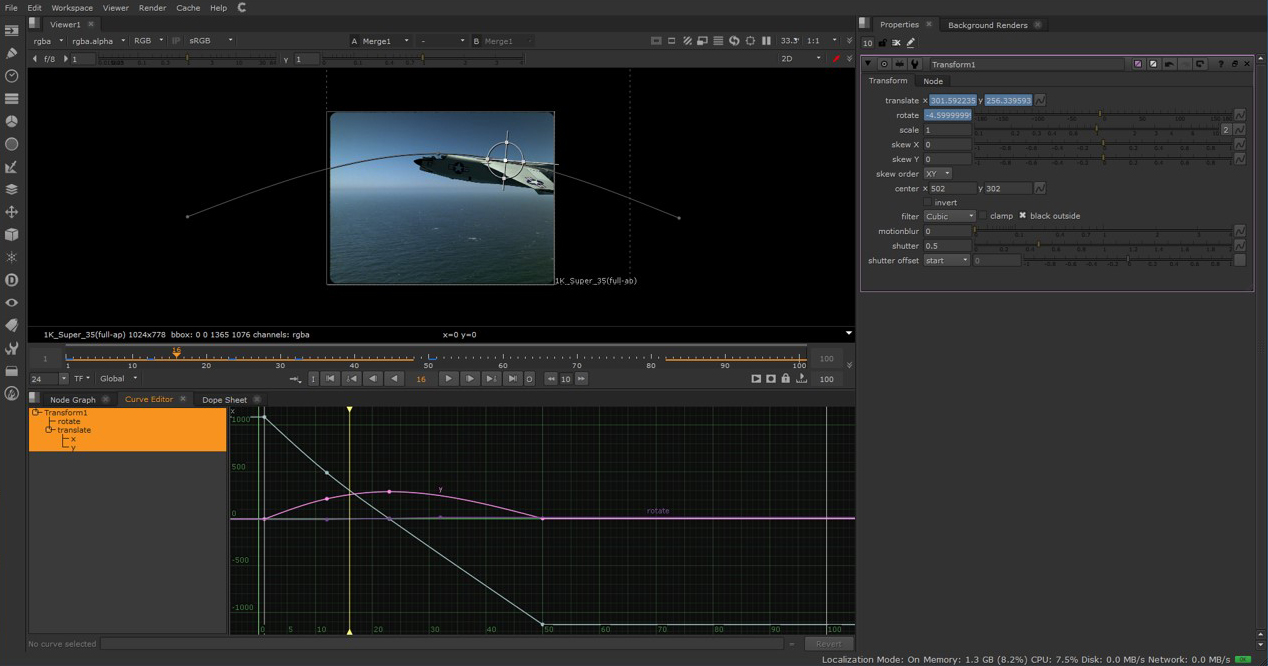
Beneath this is the second window that can alternate between 'Dope Sheet', 'Curve Editor' and 'Node Editor'. With the latter, one can write and delete nodes at will. Multiple images (as seen below of the plane and sea) can be linked in particular orders, with letters that correspond to visibility (i.e. A top, B below etc). Between these exist more subcategories (A1, A2, A3 etc.) that again work hierarchically in terms of what's visible. Each node may entail a colour swatch relating to RGBA, with the white being the Alpha Channel (A). Inserting new nodes can be done either using the toolbar top left or right clicking in the node graph and selecting from the drop down list.
Shortcuts can be a quicker alternative. You can select a node and right click to tell the program specifically where to insert the new node. Some nodes become visible on the right hand side window. For nodes like 'Glow' you can ctrl + alt while selecting the colour picker to create an alternative pop-up away from this window.
 |
| You can adjust 'Glow' and 'Grade' nodes to give the appearance of distance (atmospheric pollution). |
 |
| 'Transform' can help create animation by having the selected image move between points. |
Other shortcuts worth noting include S- Project Settings; T- Transform; M- Merge; G- Grade etc.
If unsure the shortcuts are sometimes provided in the drop down lists beside their respective command.
 |
| You can adjust the values of specific nodes using either on the 'Viewport' or using the 'Project Settings Tab' top right. |
All in all interesting so far. The program has a complexity alike Maya despite its deceptively simple layout. I'll be particularly interested to learn more about how to 'export' and finalise a composition.


Comments
Post a Comment