Nuke Toolkit | Presentation and Techniques [Lesson 2]
Our second lecture on 'Nuke' version 11.2v3 was concerned with the more common tools, their use within the program, and how to export the composition. The way Nuke functions, it's possible (and preferable perhaps) to use it as one program amongst many, editing the project before it's taken elsewhere into another program. The programme is not necessarily designed for final compressed exportation, though you can import a node that specifically alludes to that ('write' etc.). Incidentally it's possible to import file types that entail single passes and can be separated/composited at will, using the channel bar drop down options, top left of the viewport.
You can select either node image or the viewer node to view imported passes in the 'rgba' drop down. While this program composites, is worth noting that its concept of 'layers' differs significantly to Adobe's. It's possible to apply certain changes to specific nodes, rather than the all encompassing layers and groups you may see in Adobe photoshop (etc.). It's also designed for quick comparison in the viewport prior to editing the actual comp. This can help when colour correcting, filtering, manipulating images very slightly, or even when compositing different images simultaneously.


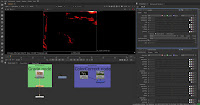
Similarly, the use of Nuke as a way of compositing separate file types (images and video etc.) is common. Below is an example of tracking, wherein the tracker node allows you to pin an image to the corresponding edges of another image and/or video.


Exporting a video similarly requires a node. 'Write' brings up the following options as seen below. It'll vary project to project, and there will be no set format to follow out every time... but it also gives a wide array of options, including continuing the footage elsewhere in an alternative program under a specific file type.

Other common reasons for using Nuke include it's ability to alter composition. Using both 'position' and 'reformat' nodes, we can work with both to adjust the footage to a specific format, (as far as the image allows).
Any further, and the program can only use the last pixels around the edge to repurpose, which would explain the strange streaking you get from expanding an image/film beyond its aspect ratio.


Lastly, but not least, colour correction is another significant reason for using Nuke. It provides a useful means of comparison, and an extensive means of changing specific tones within the overall composition. Both 'grade' and 'colourCorrect' nodes provide adjustable channels for specific elements of lighting within the image, and an additional subchannel '4' for changing specific colours within that channel.


Interestingly, green screen can also be used for changing the colour gradient within an image. The background can have an effect upon the life actors, with the green reflecting upon their skin. Dulling the greens and pushing the highlights and midtones of the reds and blues helped them return to a healthy pallor.

 |
| Selecting the node in question, and pressing d enables and disables the node, so it's easier to compare layers. |
You can select either node image or the viewer node to view imported passes in the 'rgba' drop down. While this program composites, is worth noting that its concept of 'layers' differs significantly to Adobe's. It's possible to apply certain changes to specific nodes, rather than the all encompassing layers and groups you may see in Adobe photoshop (etc.). It's also designed for quick comparison in the viewport prior to editing the actual comp. This can help when colour correcting, filtering, manipulating images very slightly, or even when compositing different images simultaneously.

You've the option to change the relationship between multiple nodes; '-', 'wipe' and 'stack', correspond to the nature of the comparison (with wipe control you can adjust the split line by dragging or rotating the handle), while 'under', 'over', 'minus' and 'onion skin' change the nature of the overlay (stacking and opacity range without wipe control etc.).


Any further, and the program can only use the last pixels around the edge to repurpose, which would explain the strange streaking you get from expanding an image/film beyond its aspect ratio.


All in all, there's plenty more tools to be explored; rotoscoping and again more work into compositing may also be beneficial to my own project. It might be worth doing some tests when compositing both draw image and 3D model within the bestiary.
We'll see!


Comments
Post a Comment